Virtual Infrastructure Client and the Windows Registry

June 17th, 2009 by jason No comments »

Hello gang. I apologize for the frequency slowdown in blog posts but I’ve been  _insert lame excuse everyone has heard before here_. Truth be told, I am busy working on a project which I hope to have available the virtualization community on or before VMworld 2009.

This post is a no brainer, maybe you’ve seen it before on another blog or maybe you’ve figured it out for yourself. For me, I can honestly say it was the latter, but with some minimal registry skills, it’s not so difficult.

In short, my Virtual Infrastructure Client (VIC) cached list of host connection entries (at the login prompt) had gotten much too polluted over time with many stale entries that I wanted to get rid of. This can happen over the course of time if you use your VIC to connect to many different vCenter servers or explicit hosts in various environments. Particularly, I would think this can happen quickly to consultants who travel from site to site supporting virtual infrastructures.

There is a way to manipulate the cached list you see in the pulldown box. And by manipulate, I don’t just mean delete. In addition to deleting entries, you can also modify entries (perhaps for a DNS suffix migration), re-order entries (VMware doesn’t maintain this list in alpha order necessarily or perhaps you’d like a custom sort order), or add entries (consider a scenario where you have a packaged VIC that you want to roll out to your new VMware admin – instead of presenting the new admin, who has no knowledge of the environment, with a blank VIC, help them hit the ground running with a pre-populated list of vCenter servers or ESX hosts to connect to).

As the title of this post indicates, the cached entries are stored in the Windows registry and are tied to each individual user profile (HKU). You’ll find the comma delimited list of entries in the following registry key:

HKU\<User SID>\Software\VMware\VMware Infrastructure Client\Preferences\

The value name is RecentConnections and the type is REG_SZ

There’s one more value nearby that sticks out like a sore thumb:

HKU\<User SID>\Software\VMware\Virtual Infrastructure Client\Preferences\UI\SSLIgnore\

The value names vary by connection name or IP address and the type is REG_SZ. These represent each connection where you’ve checked the little box telling the VIC that you want to ignore SSL certificate warnings which you will receive in an “out of the box” configuration. I can’t think of a great use case scenario why someone who has chosen to ignore SSL warnings would want to re-enable them, other than a situation where they’ve now enabled legitimate SSL.

To find out why disabling SSL warnings might not be such a great idea, see my previous blog post titled SSL Integration With VirtualCenter.

As they say in the ARMY, or at least on M*A*S*H… “That is all”.

ThinLaunch Software Announces the Immediate Availability of Thin Desktop 2.3.2

June 13th, 2009 by jason No comments »

6-13-2009 7-33-25 PM

(St. Paul, MN) ThinLaunch Software, LLC (www.thinlaunch.com) announces the immediate availability of Thin Desktop 2.3.2, Thin Desktop 2.3.2 enhances the award winning Thin Desktop application announced in August, 2008. Thin Desktop 2.3.2 simplifies deployment and adoption of Virtual Desktop Strategies by overcoming common barriers associated with the implementation of these strategies.

Thin Desktop enhances the overall value of virtualization by simplifying the deployment and implementation of virtual desktops at the user device. Thin Desktop replaces the local user interface, then locks down and monitors the user / client device. This allows the administrator to gain complete control over the client end point and the user experience. When compared to group policy methods, “registry hacks” and other similar approaches, Thin Desktop is far easier to implement, deploy and maintain. Unlike the implementation of a traditional Thin Client model, Thin Desktop requires no changes to the enterprise infrastructure and has no server footprint or management server.

When a PC or Thin Client is locked down using Thin Desktop, the typical shell / user interface is hidden from the user and replaced by the designated connection or application. At the same time, underlying capabilities allowed by the administrator can remain intact. No changes to the enterprise infrastructure are required and no additional tools or management functionality is needed.

The release of version 2.3.2 enhances deployment of Thin Desktop using industry standard methods, tools and architectures. An administrator can now deploy and implement Thin Desktop on any PC or Thin Client via standard unattended silent install capability and existing software distribution and imaging methods.

“Thin Desktop 2.3.2 is the result of feedback form a wide variety of customers with very diverse use cases and requirements. A common thread is the desire to adopt virtual desktop technologies while preserving investments in current hardware, infrastructure and skill sets – with a clear path for future hardware and virtualization options.”, said ThinLaunch Software General Manager, Mike Cardinal. “Customer environments with both PC and Thin Client devices will coexist for the foreseeable future. Most users don’t care about the box connected to the monitor, keyboard and mouse – and administrators don’t want them to care.”

For additional information and an Evaluation Download of Thin Desktop, visit the website at www.thinlaunch.com


About ThinLaunch Software, LLC
ThinLaunch Software, LLC has developed Thin Desktop to enhance the value of client device assets. Established in May of 2007, ThinLaunch software is privately held and based in Eagan, MN, a suburb of St. Paul, MN.
ThinLaunch Software and Thin Desktop are registered trademark of ThinLaunch Software, LLC. Additional trademarks and Patents Pending. Please visit the website at: www.thinlaunch.com

Tripwire Launches vWire, A Virtualization Management Solution

June 8th, 2009 by jason No comments »

6-8-2009 8-46-52 PM

TRIPWIRE LAUNCHES vWIRE, A VIRTUALIZATION MANAGEMENT SOLUTION TO MONITOR, MANAGE, AND AUTOMATE VIRTUAL INFRASTRUCTURE
vWire gives visibility and control to virtualization engineers to dramatically decrease complexity, downtime, and operational costs in virtual environments.

PORTLAND, Ore. – June 9, 2009 – Tripwire® today announced vWireTM, the first virtualization management solution to integrate change and configuration awareness into Virtual Infrastructure (VI) management. Solving a real business need for virtualization administrators, vWire continuously monitors the state of virtual systems and correlates data with critical events to provide context and insight into potential issues, and then acts to prevent and resolve problems that cause downtime.

vWire was designed based on direct input from the virtualization community to introduce a greater level of control and visibility over virtual environments. The new offering from Tripwire reduces the time that virtual infrastructure managers spend troubleshooting system failures. With vWire, IT organizations can optimize their virtual infrastructures, decrease downtime and improve reliability, while reducing operating costs through automated monitoring and problem detection.

“Tripwire is working with VMware to provide customers with solutions and tools that offer a holistic view of their virtualized environments while improving operational compliance of these systems,” said Shekar Ayyar, vice president, infrastructure alliances, VMware. “Tripwire’s new vWire extends the robust management capabilities of VMware solutions with capabilities targeted at providing increased visibility and helping troubleshoot problems quickly.”

vWire is easy to set up and requires no special training. Once installed with sufficient licenses and credentials, vWire automatically starts recording and analyzing the status of the entire virtual infrastructure. vWire is comprised of three major components:

  • Comprehensive Monitoring and Data Collection – vWire monitors all change, configuration and critical event data, providing a database of up-to-the-minute information that can be quickly accessed, searched, and filtered. vWire complements the availability features of the VMware platform by monitoring systems to help prevent or eliminate virtual system downtime.
  • Shared content – vWire data can be accessed with various combinations of filters, scripts and alerts, easily accessed through the vWire dashboard. Administrators can see at a glance the aggregated information that is relevant to ensuring the health of their virtual infrastructure. These capabilities ship with out-of-the box content, but can be easily customized. Users can also import shared content from the community, expanding the library of tools and solutions.
  • The vWire community – This online forum provides an opportunity for VI administrators, industry experts and product specialists to share content, expertise and solutions for issues involving the management of virtual systems.

According to Stephen Beaver, co-author of two books on virtualization, “Essential VMware ESX Server” and “Scripting VMware Power Tools: Automating Virtual Infrastructure Administration”, Tripwire Virtualization Evangelist, “virtualization is unique in that there can be thousands of unique configuration properties in a virtual infrastructure, and the number quickly goes up when you consider multiple objects. For example, a moderately small installation with two clusters, six ESX hosts, and 60 VMs will have 38,700 configuration properties for the clusters, hosts, and VMs. vWire’s configuration automation gives virtual administrators new visibility to effectively monitor and manage configuration, change and performance data across the virtual infrastructure – all from within VMware vCenterTM Server.”

vWire is available for immediate purchase and download at www.vwire.com. Also available at vWire.com are two free, downloadable tools to help manage virtualized infrastructure: OpsCheck, which helps ensure systems are configured to support VMware VMotionTM by rapidly analyzing ESX 3.0, 3.5, and ESXi hypervisors; and, ConfigCheck, which helps ensure VMware environments are properly configured, a recommended and essential first step when deploying and virtualizing additional servers.


About Tripwire, Inc.

Tripwire is the leader in data center compliance and infrastructure management solutions, building confidence for IT across both virtual and physical infrastructures. Tripwire Enterprise and vWire software, helps over 6,500 enterprises worldwide meet their configuration auditing, file integrity monitoring, virtual infrastructure management and change auditing needs for IT operations, security and compliance. Tripwire is headquartered in Portland, Ore. with offices worldwide. Tripwire can be found at www.tripwire.com, www.vwire.com, and @vwire on Twitter.

###

©2009, Tripwire, Inc. Tripwire is a registered trademark of Tripwire, Inc. All other marks are property of their respective owners. All rights reserved.

VMware Update Manager, Updates, and New Builds

June 7th, 2009 by jason No comments »

This was somewhat of a strange post to get off the ground. I had a definite purpose at the beginning and I knew what I was going to write about, however, through some lab scenarios I unexpectedly took the scenic route in getting to the end.

In my mind, the topic started out as “Effective/Efficient Use of Update Manager For New Builds”.

Then, while working in the lab, the title changed to “Gosh, Update Manager Is Slow”.

A while later it morphed into “Cripes, What In The Heck Is Update Manager Doing?!”

Finally I had a revelation and the topic came full circle back to an appropriate title of “VMware Update Manager, Updates, and New Builds” which is what I more or less had in mind to begin with but as I said I picked up some information which I hadn’t recognized at the beginning.

“Effective/Efficient Use of Update Manager For New Builds”

So as I said, the idea of the post started out with a predefined purpose – discussion about the use of Update Manager in host deployments. It really has more to do with host deployment methodology as a basis of discussion that it has to do with patch management. What I was going highlight was that the deployment of an ESX host goes much quicker if you start out with the most current ESX .ISO allowed in your environment and then use VMware Update Manager to install the remaining patches to bring it to current.

As an example, let’s say our current ESX platform standard is ESX 3.5.0 Update 4 with all patches up to today’s date of 6/6/09.

  • The most efficient deployment method would be to perform the initial installation of ESX using the ESX 3.5.0 Update 4 .ISO and then afterwards, use VMware Update Manager to install the remaining 15 patches through today’s date. Using Ultimate Deployment Appliance version 1.4, I can deploy ESX 3.5.0 with Update 4 in five minutes. The subsequent 15 patches using VMware Update Manager takes an additional 16 minutes, end to end including the reboot. That’s a total of less than 25 minutes to deploy a host with all patches.
  • Now let’s look at an alternative and much more time consuming method. Install ESX 3.5.0 using the original or even the Update 1 .ISO. Again, using UDA 1.4, this takes 5 minutes. Now we use Update Manager to remediate the ESX host to Update 4 plus the remaining 15 patches. If you used the original ESX .ISO, you’re looking at 149 updates. If you installed from the ESX 3.5.0 Update 1 .ISO, you’ve got 125 patches to install. This patching process takes nearly 90 minutes! Even on an IBM x3850M2 (one of the fastest hardware platforms available on the market today), the patch process is 75 minutes.

The numbers in the second bullet above speak to the deployment of one host. We always have more than one host in a high availability cluster and a typical environment might have 6, 12, or even 32 hosts in a cluster. Ideally we don’t want to be running hosts in a cluster on different patch levels for an extended duration. Suddenly we’re looking at a long day of work for a 6 node cluster (9.5 hours) and an entire weekend gone for a cluster of 12 hosts or more (18 hours +). The kicker is that this is still an automated deployment. Automation usually means efficiency right? Not in this case. Granted, there’s not a lot of manual labor involved here, but there is a lot of “hurry up and wait”.

Now before anyone jumps in and recommends rebuilding all of the hosts concurrently, let’s just count that out as an option because in this scenario, we’re rebuilding an active cluster that can only afford 1 host outage at a time (N+1). I’m actually being generous with the time durations because I’m not even accounting for host evacuations, which at the vCenter default of 2 at a time, can take a long time on densely populated clusters. It’s a real world scenario and if you don’t plan ahead for it, you may find out there is not enough time in a weekend to complete your upgrade.

Moral of this section: When deploying hosts, use the most recent .ISO possible which has all of the updates injected into it up to the release date of the .ISO.

“Gosh, Update Manager Is Slow”

I’ve heard some comments via word of mouth about how slow Update Manager is. Myself, I thought the comments were unfounded. I’ve never had major issues with Update Manager aside from a few nuisances I’ve learned to work around. Having managed ESX environments before the advent of Update Manager, I’m grateful for what Update Manager has brought to the table in lieu of manually populated and managed intranet update repositories. I never really noticed the Update Manager slowness because I was always deploying new host builds from the latest ESX .ISO as I described in the first bullet in the section above, and then applying the few incremental post deployment patches. Deploying the full boat of ESX patches using Update Manager has opened up my eyes as to how painfully slow it can be.

One interesting thing that I discovered in the lab was not only is the patch deployment process longer, the preceding scan process is as well. The interesting component is that both the scan and the remediate steps seem to scale in a linear fashion, whether that is actually true or just a coincidence, who knows. What I mean is that:

  • An ESX 3.5.0 Update 4 host took 1 minute to scan and 16 minutes to remediate
  • An ESX 3.5.0 Update 1 host took 5 minutes to scan and 84 minutes to remediate

So we’re wasting extra time in both of the remediation processes: The scan, and the remediate.

Moral of this section: Update Manager or ESX patch installation or both is slow, but it doesn’t have to be. Same as the moral of the first section: Avoid this pitfall by using the most recent .ISO possible which has all of the updates injected into it up to the release date of the .ISO.

“Cripes, What In The Heck Is Update Manager Doing?!”

So then curiosity got the best of me and I took the lab experiment a little further. Of the 84 minutes spent remediating ESX 3.5.0 Update 1 host above, how much of that time was spent installing Update 4, and how much of the time was spent installing the 15 subsequent post Update 4 patches? Afterall, I already know that remediating the 15 post Update 4 patches by themselves takes only 16 minutes. Will the numbers jive?

To find out, I deployed an ESX 3.5.0 Update 1 host and created a remediation baseline containing ONLY ESX 3.5.0 Update 4. Big sucker – 723MB, but because it’s just one giant service pack, perhaps it will install quicker than the sum of all its updates. Here’s where I was really wrong.

I remediated the host and expected to see 1 task in vCenter describing an installation process, and then a reboot. Instead, I saw a boatload of patches being installed:

6-7-2009 12-26-22 AM

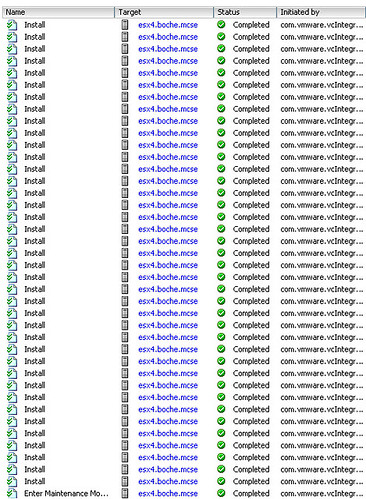
Which brings me to the title of this section “Cripes, What In The Heck Is Update Manager Doing?!” Did I apply the wrong baseline? Did Update Manager become self aware like Skynet and decide to engineer its own creative solutions to datacenter problems? Turns out Update 4 is not a patch or a service pack at all. In and of itself, it doesn’t even include binary RPM data. It’s metadata that points to all ESX 3.5.0 patches dated up to and including 3/30/09. Sure, you can download Update 4 as a 724MB offline installation package from the VMware download section, but mosey on over to their patch repository portal and you’ll see that the giant list of superseded and included updates in Update 4 is merely an 8.0K download. At first I thought that had to be a typo and I was about to drop John Troyer an email but opening up that 8K file just for kicks was the eye opener for me. Take a look at the 8K file and you’ll see the metadata that tells Update Manager to go download many of the incremental patches leading up to 3/30/09. Same concept with the 724MB offline installation package. It’s a .ZIP file. Open it up and you won’t find a large 724MB .RPM. Instead you’ll find a directory structure containing many of the incremental updates leading up to 3/30/09.

Moral of this section: Same as the moral of the first and second sections: Avoid wasting your valuable maintenance window time by avoiding as many incremental ESX patches as possible. Use the most recent .ISO possible which has all of the updates injected into it up to the release date of the .ISO when you deploy a host.

“VMware Update Manager, Updates, and New Builds”

Connect the dots and I think we’ve got a best practice in the making for host deployments using Update Manager. Existing and new host deployments aside, look at the implications of using Update Manager to deploy a major Update (in this discussion, Update 4). It’s actually 5 times faster to rebuild the host with the integrated Update 4 .ISO than it is to patch it with Update Manager. To me that’s bizarre but it is reality if you have automated host deployment methods. For medium to large environments, automated builds are absolutely required. There’s not enough time in the weekend to patch an 18 host cluster, let alone a 32 node cluster using Update Manager. Rebuild from an updated .ISO or span your host updates over several maintenance windows. The latter could get hairy and I definitely would not recommend it.

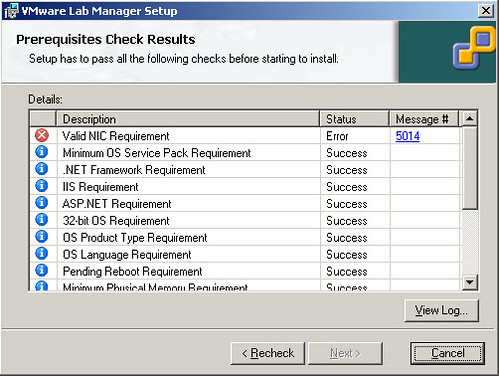
Great day today and I got a lot accomplished in the lab. Unfortunately towards the end, this happened:

6-7-2009 1-08-09 AM

Replacement unit is already on the way from NewEgg. Thank you vWire for funding the replacement!

VMware VCP # 1

May 28th, 2009 by jason No comments »

IMG00074-20090528-1140

Left to Right: VCP#1, VCP#2712

This is VMware history.

vSphere Has Arrived

May 21st, 2009 by jason No comments »

It has been a long wait but last night (and to my surprise) vSphere was finally released and from what I’ve seen so far, it was well worth the wait. Not that VI3 isn’t a great product, but the new features vSphere boasts are absolutely amazing. Whereas with VI3 VMware put any resemblance of competition to shame, vSphere totally and completely annihilates it.

With the vSphere NDA embargo lifted a while back for bloggers, there has already been plenty of coverage on most of the new features so I’m not going to go into each of them in great detail here. I’ll just touch on a few things that have caught my attention. There is plenty more to digest on other blogs and of course VMware’s site.

First of all, let me get this out of the way: By far the best and most complete collection of vSphere resources on the internet can be found at Eric Siebert’s vSphere-land site. If you can’t find what you’re looking for there, it doesn’t exist.

Now, a few of my favorite and notable observations thus far:

  • The What’s New in vSphere 4.0 page – This is the list of new major features in vSphere. Note there are approximately 150 new features in vSphere in all, this is the list of the major notable ones worth highlighting:
    • One feature which was news to me and I hadn’t seen during the private beta was Virtual Machine Performance Counters Integration into Perfmon which seems to have replaced the shortlived and ‘never made it out of experimental support’ VMware Tools Descheduler Service. “vSphere 4.0 introduces the integration of virtual machine performance counters such as CPU and memory into Perfmon for Microsoft Windows guest operating systems when VMware Tools is installed. With this feature, virtual machine owners can do accurate performance analysis within the guest operating system. See the vSphere Client Online Help.”
    • New CLI commands: vicfg-dns, vicfg-ntp, vicfg-user, vmware-cmd, and vicfg-iscsi
    • There appears to be no end in sight for product name changes. VIMA has become vMA. It’s still 64-bit only as far as I know.
    • It’s official, and Rick Vanover reported it first in Virtualization Review magazine: Storage VMotion renamed to Enhanced Storage VMotion, particularly when changing disk formats hot on the fly (ie. full to thin provisioned). Not to be confused with Enhanced VMotion Compatibility (EVC) which is a completely different feature – I predict a lot of people confusing these two technologies interchanging one for the other.
  • The Upgrade Guide – Easy but critically important reading. A few things that I quickly pulled of this document that are worth noting:
    • SQL2000 is not a supported database platform for vCenter. SQL2008 is on the supported list. Good job VMware. Some folks may remember it taking an inconveniently long time to get SQL2005 on the supported database list when VI3 was released.
    • Another vCenter database detail I caught: During an upgrade, DBO must be granted to both MSDB and the vCenter database whereas with VI3 DBO was only needed on MSDB and you didn’t dare grant DBO to the vCenter database or you ended up with new database tables and an empty datacenter.
    • Quickly summarized, the VM upgrade path is: VMware Tools, shut down VM, upgrade VM hardware to version 7, power on. No VMFS datastore upgrades to worry about.
    • Both the 2.5 VIC and vSphere client can be installed simultaneously on the same machine and is supported as such. This will be very helpful for customers straddling both VI environments during their transition. I’ve got a blog entry coming up on ThinApp’ing the client soon which will provide yet another client installation option.
  • Configuration Maximums for VMware vSphere 4.0 – Ahh once again my most favorite VMware document of them all. Look at some of these insanely scalable supported configurations:
    • 8 vCPUs in a VM
    • 255GB RAM in a VM
    • IDE drive support in a VM
    • 10 vNICs in a VM
    • 512 vCPUs per host
    • 320 running VMs on a host
    • 64 lCPUs in a host
    • 20 vCPUs per core
    • 1TB RAM in a host
    • 4,096 virtual switch ports in a host
    • These are just a few that I hand picked. We’re looking at serious consolidation ratio possibilities here!
  • Systems Compatibility Guide – This is the offline version of the vSphere HCL. Ok, in case you have been living under a rock, vSphere is 64-bit only. You’ll want to make sure your hardware is compatible with vSphere. I won’t beat around the bush here – A lot of hardware that was supported by VI3 has dropped off the list (even much of the 64-bit hardware). If you don’t have the required hardware now, plan your 2010 budget accordingly. As a point of interest, I found it odd that an HP DL385G2 and G5 was on the HCL, but the G3 and G4 are missing. Pay close attention, particularly if you plan to utilize FT as that feature carries with it its own set of strict requirements.

There are boatloads of new goodies in vSphere. It’s going to be around for a long time so take your time to learn it. No need to rush or be the first datacenter to run vSphere for bragging rights. Watch the blogs and the bookstores. There will be new vSphere content gushing from all angles for many months and even years to come. Be sure to share your findings with the VMware virtual community. Collaboration and networking makes us strong and successful.

Lab Manager “Valid NIC Requirement” prerequisite check fails

May 17th, 2009 by jason No comments »

If you’re installing Lab Manager 3.x and the Valid NIC Requirement prerequisite check fails, verify your Lab Manager server has a static IP address configuration and not a configuration that is assigned by DHCP.

For other Lab Manager requirements, be sure to check out the Installation and Upgrade Guide.

5-17-2009 12-32-11 PM